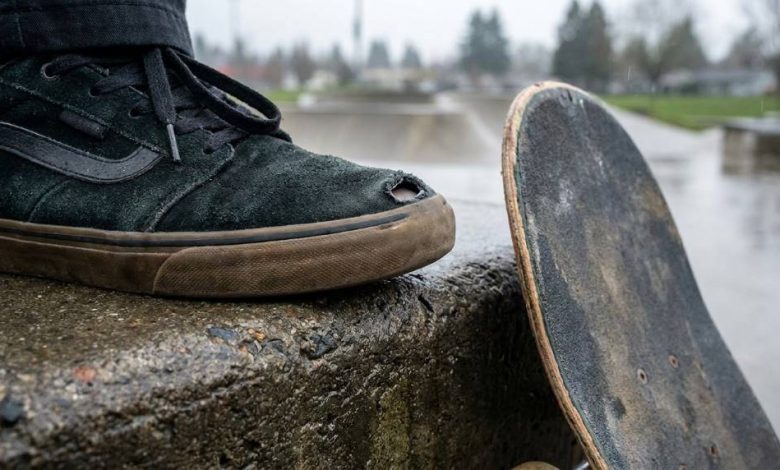
Yes, you can fix quick skateboard toe blowouts by reinforcing worn areas before the upper separates. Start with abrasion control, then improve fit and choose pro skater footwear suited for repeated foot movement. A toe blowout usually develops in two stages: abrasion first, separation second. Portland riders also face wet conditions that can complicate shoe drying and material care.
Key Takeaways Before You Repair
- Inspect the toe before a small scuff becomes a complete opening.
- Clean and dry the shoe before applying any adhesive or patch.
- Use flexible reinforcement that moves naturally with your foot.
- Reduce toe drag by checking your stance and trick technique.
- Replace shoes when structural damage reaches the sole or midsole.
- Choose durable skate shoes when repairs become repeatedly necessary.
1. Find What Causes the Toe Blowout
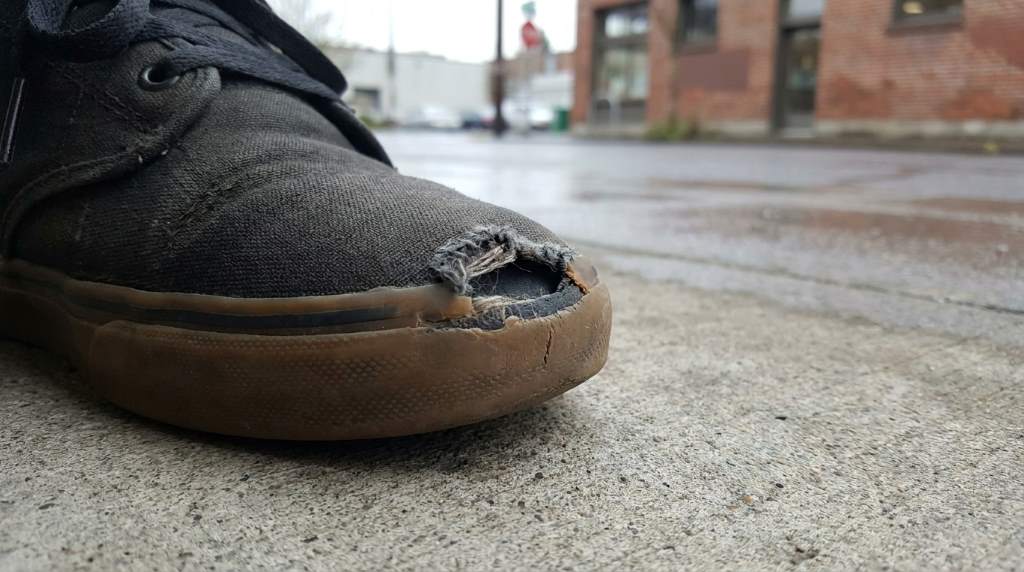
First, inspect exactly where your shoe wears through during skating sessions. Most quick blowouts begin where repeated friction concentrates around the big toe area. Look for thinning fabric, exposed stitching, polished suede, or a developing hole. These signs reveal the problem before the damage spreads across the upper.
Next, examine your stance because foot position can create uneven pressure inside the shoe. A shoe can fail quickly when your toes repeatedly press against one small section. Therefore, compare both shoes and identify whether the same area wears faster. That comparison often separates technique problems from ordinary material fatigue.
Check Toe Drag and Board Contact
Toe drag can destroy an otherwise durable shoe surprisingly quickly. During flips, your front foot can scrape the upper against grip tape repeatedly. Meanwhile, worn grip tape can create sharper friction points across already weakened material. Adjusting your foot position can therefore extend shoe life without changing your entire setup.
Check your board after noticing unusual shoe damage around the toe. Rough grip, exposed edges, or damaged hardware can create concentrated contact points. Also inspect your trucks and deck alignment for anything that changes your normal foot placement. Small equipment changes can sometimes explain sudden footwear failures.
2. Choose a Repair Method That Matches the Damage
Small scuffs need different treatment from open holes or detached toe panels. For light abrasion, clean the area and apply a flexible shoe adhesive over the thinning material. For larger damage, add a thin reinforcement patch beneath or over the weakened section. This approach creates a stronger barrier without making the toe excessively rigid.
Before repairing, review this boys girls cruiser review for broader footwear and riding considerations. Then select a repair material that matches your shoe’s flexibility and surface. Avoid household glues that cure extremely hard because they can crack during repeated board movements. Instead, use flexible adhesives designed for footwear repairs.
Repair a Small Abrasion
Start by brushing away loose fibers and surface dirt around the damaged section. Then wipe the area carefully and allow it to dry completely. Apply a thin adhesive layer that extends slightly beyond the worn section. Finally, press the material flat and let the repair cure according to its product instructions.
Keep the adhesive layer thin because excessive material can create an uncomfortable pressure point. Also avoid skating immediately after applying the repair. A rushed repair can separate before the adhesive reaches proper strength. Give the repaired area enough curing time before testing it under real skating pressure.
Patch a Developing Hole
When the toe already contains a hole, reinforcement becomes more important than surface coating. Cut a flexible patch slightly larger than the damaged section. Round the patch corners because sharp corners can catch and peel during skating. Position the patch carefully, then bond it evenly across the damaged area.
For suede shoes, avoid saturating the surrounding material with adhesive. Excess glue can stiffen the upper and change how the shoe flexes. Instead, concentrate adhesive beneath the reinforcement and along its edges. A clean edge usually provides better durability and a more comfortable result.
3. Reinforce Your Skate Shoes Before They Fail
Prevention works better when you reinforce shoes before the upper becomes paper-thin. A thin protective layer can absorb friction while preserving normal toe flexibility. However, reinforcement should never create a bulky ridge against your toes. Comfort matters because pressure points can change your foot placement while skating.
If your setup needs additional maintenance, consider an ultimate skateboard hardware kit alongside your footwear checks. Tighten loose hardware and inspect the deck whenever shoe wear suddenly increases. A stable setup helps maintain consistent foot placement across repeated tricks. Consequently, your shoes face fewer unexpected contact points.
Use Flexible Toe Protection
Toe guards work best when they cover the highest-friction area without restricting movement. Choose a material that bends easily when you curl your toes. Place reinforcement over the contact zone rather than covering the entire toe unnecessarily. This targeted approach preserves flexibility while slowing additional abrasion.
Some riders prefer adhesive patches because they install quickly and remain relatively discreet. Others prefer dedicated shoe repair compounds for irregular or curved damage. Either method can work when you prepare the surface correctly. The key remains proper bonding, adequate curing, and controlled material thickness.
Strengthen the Inside When Appropriate
Internal reinforcement can help when external patches interfere with board feel. A thin fabric layer inside the toe can reduce pressure against weakened material. However, inspect the interior carefully before adding anything beneath your toes. An uneven patch can create friction against your skin during long sessions.
Keep internal reinforcement smooth and securely bonded around every edge. Never leave loose corners that can curl beneath your foot. Also test the shoe indoors before returning to demanding tricks. If the repair changes your foot position, modify or remove it before skating.
4. Prevent Fast Blowouts With Better Skate Shoe Choices
Repeated repairs often indicate that your footwear does not match your skating style. High-frequency flicking demands different durability characteristics than cruising or occasional park sessions. Look for reinforced toe areas, durable suede, strong stitching, and flexible construction. Your preferred tricks should guide which features receive the most attention.
For more buying guidance, read this resource about find durable skate shoes before replacing damaged footwear. Compare construction rather than choosing shoes based only on appearance. A reinforced toe cap can matter more than decorative panels for aggressive technical skating. Likewise, outsole flexibility can influence comfort during repeated foot movements.
Match Construction With Your Riding Style
Technical skaters should prioritize abrasion resistance around the flicking zone. Riders who cruise frequently may value comfort, flexibility, and weather tolerance instead. Meanwhile, heavier sessions require stronger stitching and more substantial upper construction. Therefore, buy for actual use rather than the shoe’s marketing category.
Vulcanized and cupsole designs can feel different underfoot during skating. Vulcanized shoes often provide flexible board feel and natural break-in. Cupsole designs can offer additional structure and impact protection. Neither construction automatically prevents toe blowouts because material quality and skating technique still matter.
Do Not Ignore Portland Weather
Wet shoes can become harder to maintain when moisture remains trapped inside the upper. After skating in damp conditions, remove the insoles and let the shoes dry naturally. Avoid intense direct heat because excessive heat can damage adhesives and materials. Rotate between pairs when your skating schedule allows enough drying time.
Keep shoes away from sealed bags immediately after wet sessions. Instead, open the shoes fully and improve airflow around the upper. Stuffing them temporarily with absorbent paper can help manage excess moisture. Replace the paper when it becomes damp and allow the shoes to dry completely.
5. Improve Your Skateboard Setup to Reduce Shoe Damage
Footwear durability depends partly on the equipment beneath your feet. Rough grip tape creates more abrasion than a smoother, properly maintained surface. However, extremely smooth grip can reduce control and force unwanted foot movement. Choose grip that provides dependable traction without creating unnecessary shoe wear.
Inspect your deck whenever a new pair develops damage unusually fast. Check the grip surface for raised sections, torn edges, or embedded debris. Also examine the deck’s shape around areas where your shoes contact frequently. These simple checks can reveal mechanical causes behind repeated footwear failures.
Replace Worn Grip Strategically
Do not replace grip automatically after every minor shoe scuff. Instead, inspect whether the grip itself has developed rough or damaged sections. Replace it when irregular surfaces interfere with consistent foot placement. A clean installation should also avoid exposed edges that can catch footwear material.
When installing new grip, press it firmly across the deck surface. Trim the edges cleanly and check the perimeter for loose sections. Then run your hand carefully across the finished installation. A consistent surface reduces unexpected friction during repeated skating movements.
6. Know When a Repair Has Reached Its Limit
Repairs can extend useful shoe life, but they cannot restore every damaged component. Stop relying on patches when the sole separates significantly from the upper. Also replace shoes when the midsole loses essential cushioning or structural support. Continuing with compromised footwear can affect comfort, control, and confidence.
A useful rule involves watching the progression rather than one isolated hole. If the same location needs repeated repairs, the underlying construction probably cannot handle your skating demands. Likewise, widespread stitching failure suggests general material fatigue. At that stage, replacement usually provides better value than another temporary repair.
Use a Simple Wear Test
Before each session, squeeze the toe and flex the shoe naturally with your hands. Check whether the upper bends smoothly without exposing new cracks or separations. Then inspect the outsole for unusual gaps or severe wear. This quick inspection takes less than a minute and can prevent unpleasant surprises.
After skating, examine the toe under good lighting before storing your shoes. Early detection makes small repairs easier and usually produces cleaner results. Therefore, treat shoe inspection like checking your trucks or bearings. Consistent maintenance protects both your equipment and your skating routine.
7. A Practical Toe Blowout Repair Routine
Start by identifying the damaged area and removing loose material around its edges. Clean the surface carefully, then allow it to dry completely before applying anything. Next, choose either flexible adhesive or a suitable reinforcement patch. Finally, apply the repair evenly and follow the manufacturer’s curing instructions.
After curing, flex the toe repeatedly with your hands before skating. Check whether the repaired section remains attached without creating hard pressure points. Then perform several gentle movements before attempting technical tricks. Gradual testing gives you an opportunity to catch weak repairs early.
Your Five-Minute Pre-Skate Check
- Toe: Check for thinning, cracks, exposed stitching, or new holes.
- Grip: Look for rough edges and raised sections near contact areas.
- Sole: Inspect separation, deep wear, and unusual flexing.
- Fit: Confirm your toes stay secure without excessive movement.
- Moisture: Make sure the upper and interior feel completely dry.
This routine works because it catches several failure points before they become expensive problems. More importantly, it keeps footwear maintenance connected to your actual skating habits. Consistency matters more than performing a complicated repair every few months. A short inspection after each session can reveal gradual changes early.
Conclusion: Fix the Cause, Not Just the Hole
Quick skateboard toe blowouts usually come from repeated friction, poor fit, equipment contact, or unsuitable shoe construction. You can often extend shoe life by repairing early, reinforcing weak areas, and correcting the source. However, severe structural damage deserves replacement rather than another temporary patch.
Start your next session with a close toe inspection and check your board’s contact surfaces. Repair minor damage before skating, improve drying habits, and choose footwear around your riding style. If blowouts continue, replace the shoes with a more durable construction suited to your technique. Taking these steps now can save money and keep your skating sessions comfortable.
Call to action: Inspect your current skate shoes today and repair the first signs of toe wear. Then review your setup and footwear choice before the next serious session.
FAQs About Fixing Skateboard Toe Blowouts
Can I repair a small skateboard toe hole?
Yes, you can repair a small toe hole with flexible adhesive and suitable reinforcement before damage spreads.
Why do my skate shoes tear so quickly?
Fast tearing usually results from repeated grip friction, toe drag, poor fit, or footwear that lacks suitable reinforcement.
Is super glue good for skate shoe repairs?
No, rigid super glue can crack during flexing, so flexible footwear adhesive generally works better.
How can I make skate shoes last longer?
Rotate pairs, dry them properly, inspect grip, repair abrasion early, and choose construction suited to your skating style.
When should I replace skate shoes instead?
Replace them when the sole separates, structural support collapses, or repeated repairs cannot restore dependable performance.